In previous chapter, we have gone through assembling SCORER starter kit and installing SCORER SDK to an SD card.
The goal of this chapter is to make your Raspberry Pi connect to WiFi network so you can access the SCORER Camera Control from your computer’s browser. In order to do so, you will need to do few modifications to the configuration file.
1.Find Your WiFi Network Information
First step is to find the SSID, Pass Key and Security Type for your Wi-Fi network. From most home routers, you can find this information on a sticker on the back of the router. Else you can also access the web interface of the router to obtain this WiFi network information.
e.g. What you see in below is a screenshot of web interface of HUMAX HG100R-02JG router. You can find WiFi network information in red circles.

2.Modify The Conifg File
Modify the configuration file with the information obtained in previous step as described below.
- Insert the SD card containing SCORER SDK into your computer's card reader
- Files inside the SD card should look like this:
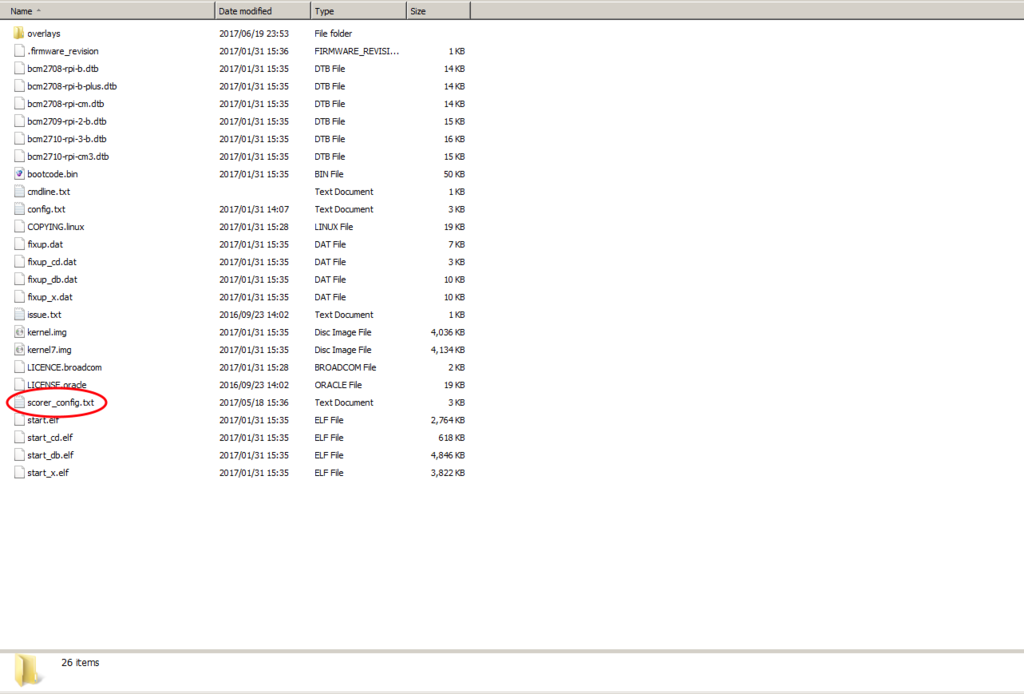
Find a configuration file named “scorer_config.txt” and open it with a texteditor such as Notepad.

Modify the configuration file as follow:
--EDIT--
Edit these two variables:
country=JP #Set the two letter country code according to the country of network that #your Raspberry Pi is connecting to. You can find those country code at
#https://en.wikipedia.org/wiki/ISO_3166-1_alpha-2
[wpa_supplicant.conf R:1] #Alter R:1 to R:2
--ADD--
Add following lines after paragraph “update_config=1”
network={
ssid=”” #Type SSID with quotations(“)
psk=”” #Type PASS KEY with quotations(“)
key_mgmt= #Type Security Type after equal sign(=)
priority=1 #Type as shown on left
}
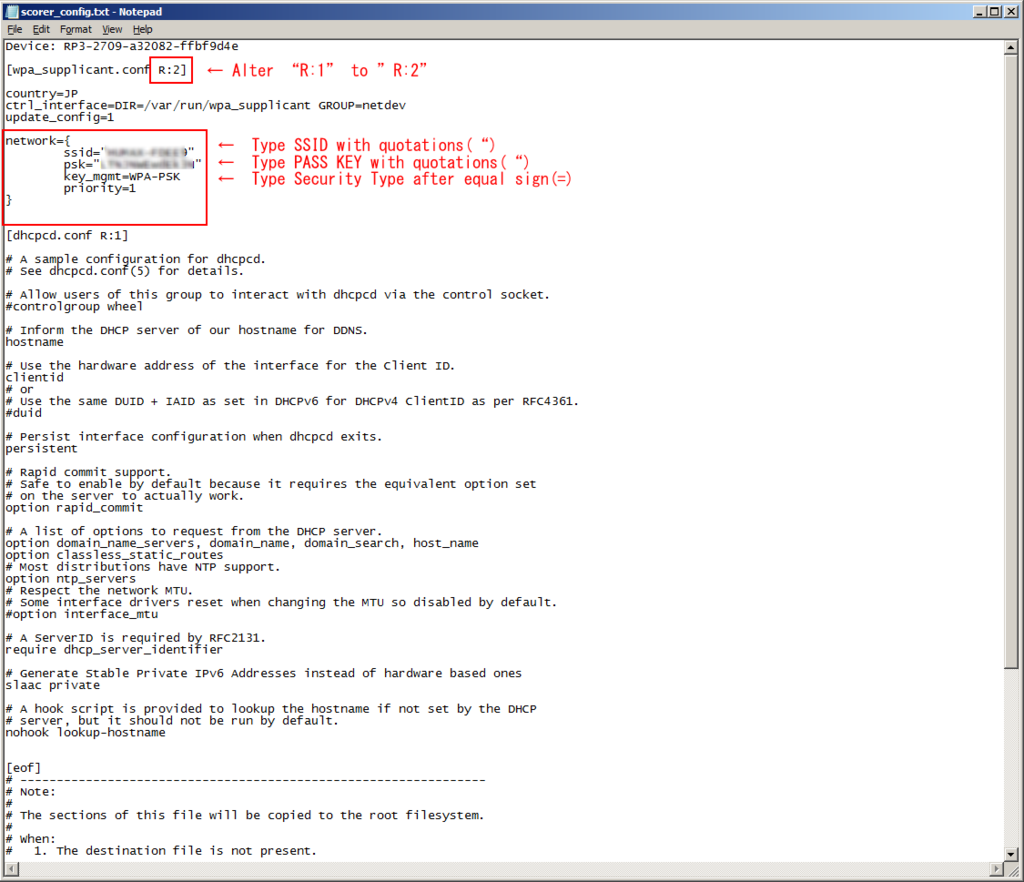
Save the changes when done and close the editor. Eject the SD card from your computer.
3.Check The Network Conncection
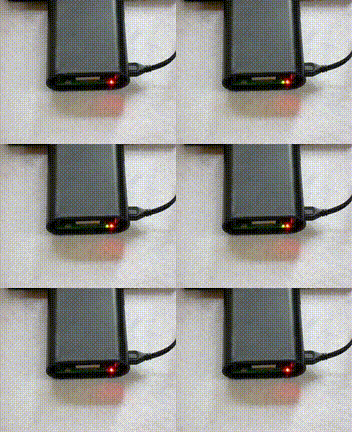
You can check your WiFi network connectivity of the Raspberry Pi by green LED's blinking pattern.
- Insert the SD card into your Raspberry Pi
- Turn on the power
- If the green LED light blinks with regular cycles like shown below, your Raspberry Pi is connected to the WiFi network.
!! NOTE 1 !! The cover has been removed for demonstration purpose
!! NOTE 2 !! Ensure that the web camera is plugged into a your Raspberry Pi
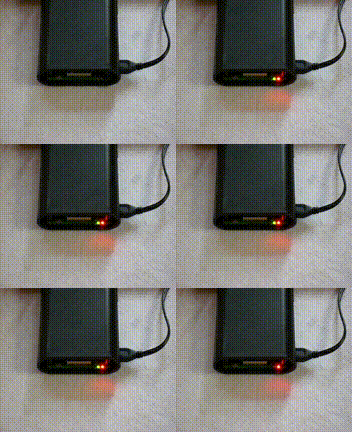
If the green LED light blinks few times then stops blinking, it means that the configuration file has some issues.
4.Aquire IP address from Bonjour Browser
We recommend to use ‘Bonjour Browser’for checking IP address of your Raspberry Pi.
- Download ‘Bonjour Browser‘ from(http://hobbyistsoftware.com/bonjourbrowser)
- Install ‘Bojour Browser‘ to your computer
- Following window appear as you start ‘Bonjour Browser‘
!! NOTE !! You might have found several available Bonjour services in the list. This is because ‘Bonjour Browser‘ picks up any devices uses Zeronconf technologies in same network.
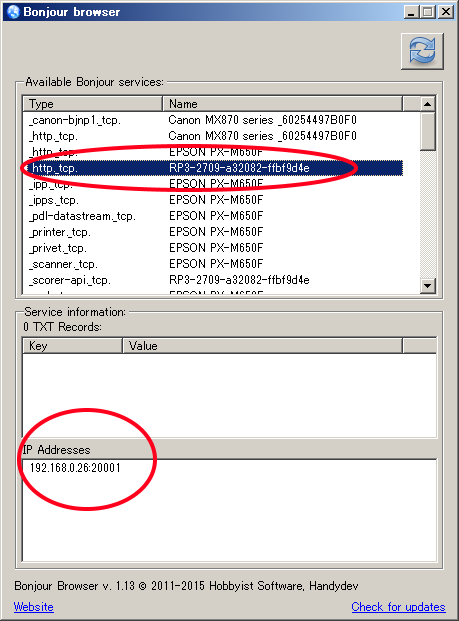
- If you find service names as “RP3-XXXX”, it means that your Raspberry Pi has established connection to the network
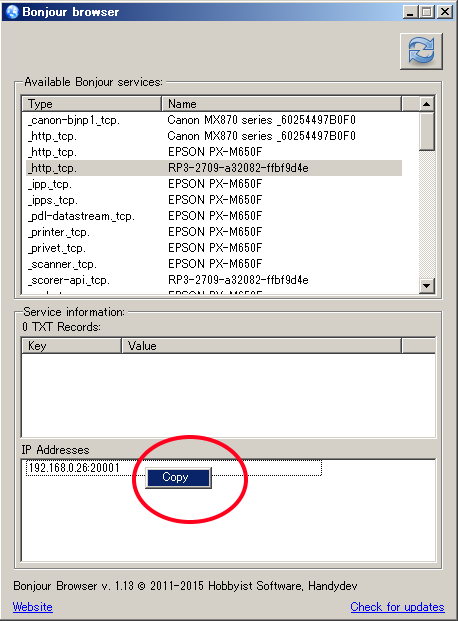
- You will find several “RP3-XXXX” in the “Name” column. Click each of them until you find IP Addresses field with port number of 20001. Right click that IP address and click “Copy”.
5.Access to SCORER Camera Control
You are now ready to access to SCORER Camera Control(SCC).
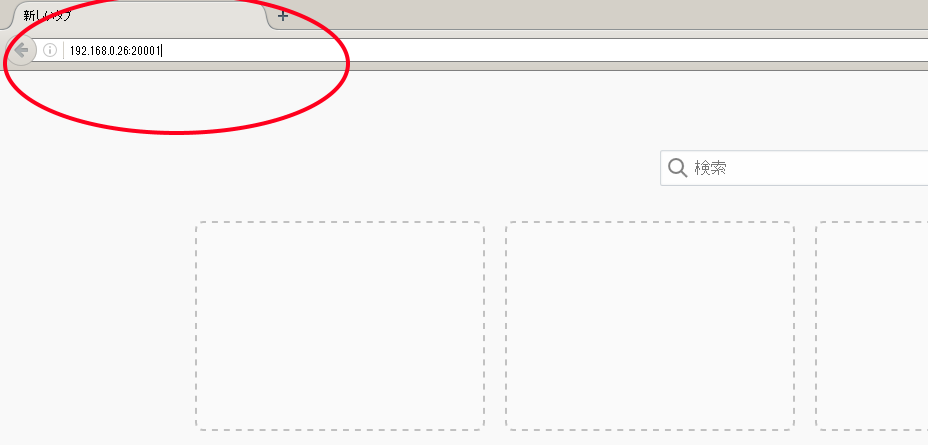
Start your favorite browser and paste the IP address copied in the previous step in the address bar.
You should see SCC in the browser like the screenshot below.
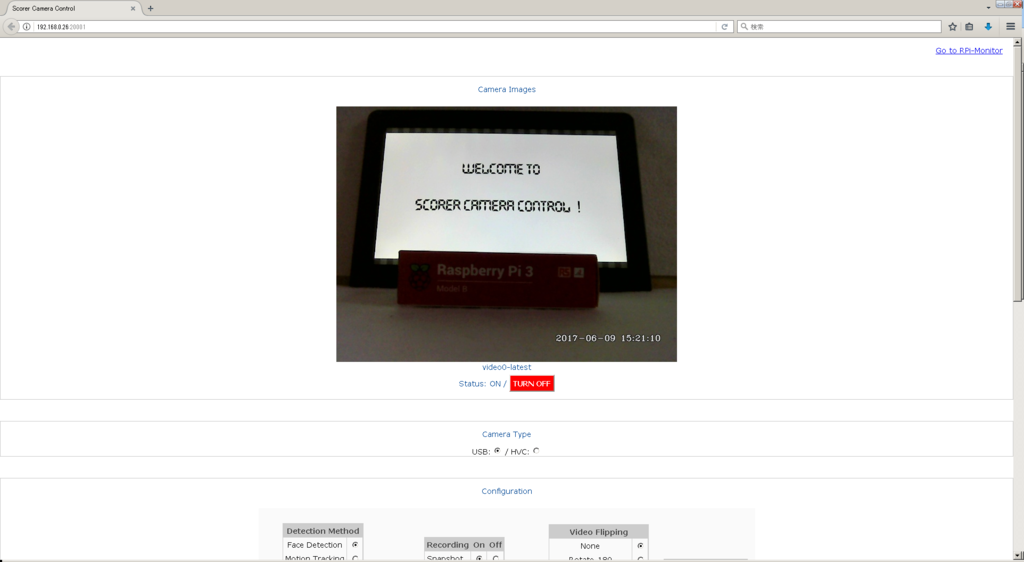
This is it!! Your Raspberry Pi is now connected to the Wi-Fi network and you have access to SCC.
In the next chapter, we will explain what each configuration offers in SCC and demonstrate how each radio button affects output of web camera.