This is detailed SCORER update Information for version 3.x (3.0, 3.1 and 3.2). This blog will focus on upgraded features, improvements, and problem fix from version 2.0 to the latest version, 3.2.
[Release Date]
- Update 3.0 = June 13, 2017
- Update 3.1 = July 7, 2017
- Update 3.2 = August 7, 2017
[Latest SDK Image File]
You can download “scorer-starter-kit-for-rp3_2017-07-27r2.zip” from our site: http://downloads.scorer.jp/sdk.html
What’s new in the update 3.x (3.0, 3.1 and 3.2):
- Performance/stability improvements and bug fixes for SCORER system
- New features
- New functions, and problem fixes for SCORER Starter(SS)
- New functions, general improvements, and problem fixes for SCORER Camera Control(SCC)
- New functions for SCORER Management Console(SMC)
In this chapter, we will go over 1, 2, and 3 from above list.
1.Performance/stability improvements and bug fixes for SCORER system
- Improved the performance/stability of a Raspberry Pi by optimizing resource allocation to avoid memory depletion
- You can now use an SD card across multiple Raspberry Pi without any need to re-register at SS.
- Tweaked parameter for smoother and faster recording and streaming HD videos/pictures
- Faster rendering of device names in the “Device List” on SS
2. New features
- Preinstalled Hubot
Hubot helps you remotely control your Raspberry Pi by typing in commands in chat tools like Slack. We are planning to provide Hubot sample code for SDK in near future
- Introducing the SCORER Drive
With in-app purchase, you can subscribe unlimited storage space for logs/movies/pictures for maximum duration of one year. Price will vary from duration of subscription.
- Data will not be deleted by ‘SCORER initialization process at SMC’(*)
After initialization at SMC, you can re-register at SS and still be able to access the old data
* Here are steps to initializing Raspberry Pi at the SMC:
- Login to SMC
- At initial page, click the thumbnail of Raspberry Pi that you want to initialize
- Click trash can icon in bottom right corner
- Click “DELETE” at confirm window
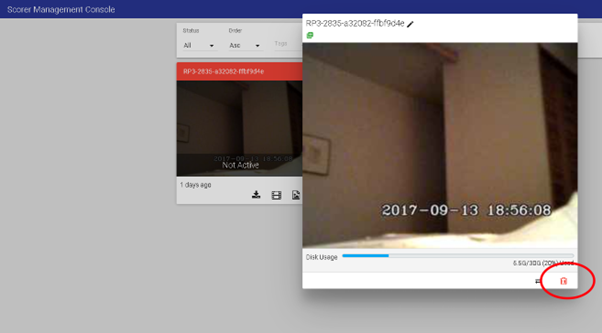
【SMC Initializing Raspberry Pi.PNG】
3. New functions and general improvements for SCORER Starter(SS)
--New functions--
- SCORER Drive
As mentioned in chapter 2, SCORER Drive subscription provide unlimited storage space for logs/movies/pictures for maximum duration of one year. Here are how you can reach the in-app purchase page:
- Login to SS
- At the “Device List” screen, tap “Setting” (the gear symbol on top right corner)
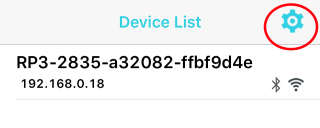
【SS In-App Purchases1_EN.PNG】
3. At the “Configuration” screen, tap “Item purchase”
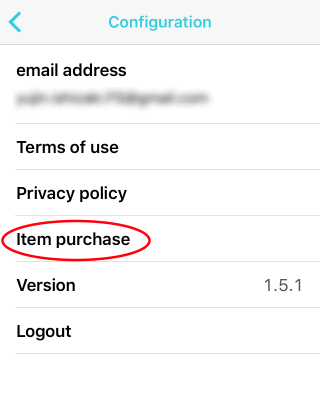
【SS In-App Purchases2_EN.PNG】
4. Tap “OK” at bottom of the “Item purchase” screen
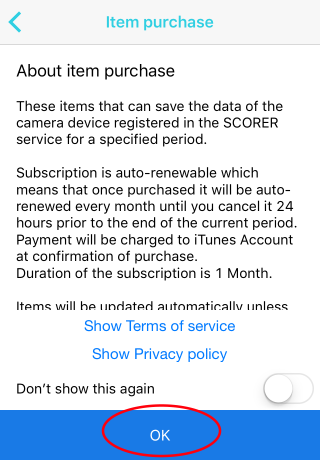
【SS In-App Purchases3_EN.PNG】
5. Read through the “About SCORER Storage”. Tap “X” in the right top corner of your screen to continue
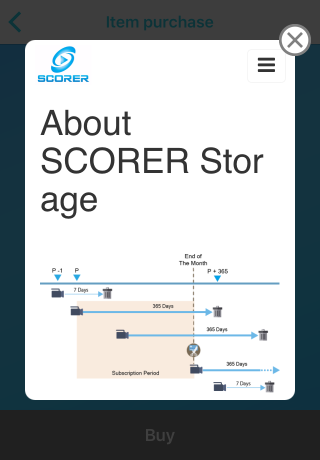
【SS In-App Purchases4_EN.PNG】
6. Input “Data retention” in days you like to subscribe. Then input number of cameras in “Camera device” section. After input data, it will calculate and give you a price on the screen. If you are agree with it, tap “Buy” to continue
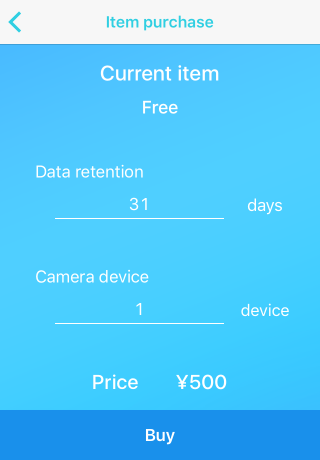
【SS In-App Purchases5_EN.PNG】
- Setting static IP address
You can set static IP addresses for your Raspberry Pi. Note, this function is only available on wired LAN connection. Here are steps(premise: your Raspberry Pi is not registered at SS and is connected to SS over BLE)
- Login to SS
- At the “Device List” screen, tap name of the Raspberry Pi of your choice
- At the “Menu” screen tap “Connect to Network”
- At the “Connect to the network” screen, tap “Wired LAN”
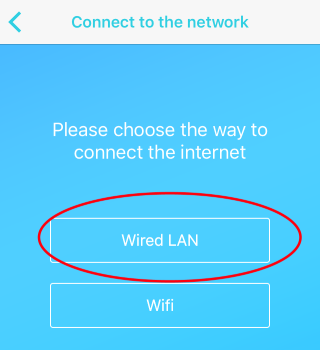
【SS Static IP address1_EN.PNG】
5. Check the LAN cable is connected to the Raspberry Pi then tap “Wired LAN”
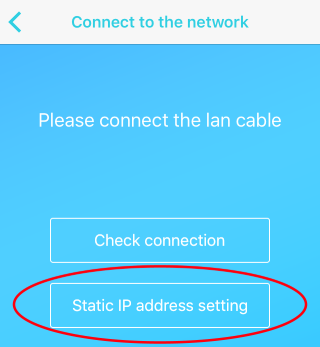
【SS Static IP address2_EN.PNG】
6. Tap “Static IP address setting”
7. At the “Static IP address setting” screen tap “+” sign at bottom right of the screen
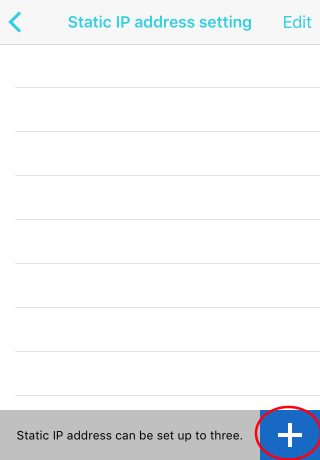
【SS Static IP address3_EN.PNG】
8. At the next screen, type in necessary info in ”Interface”, ”IP address”, ”Router”, and ”DNS”. Then tap “Create” to continue
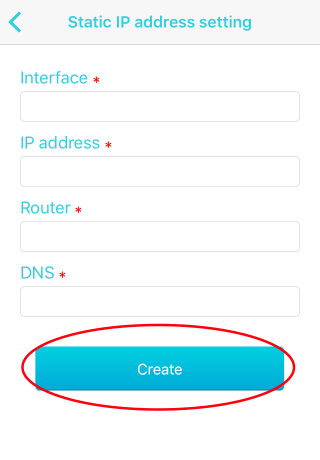
【SS Static IP address4_EN.PNG】
9. On the “Static IP address setting” ensure that correct Static IP address is shown on the list
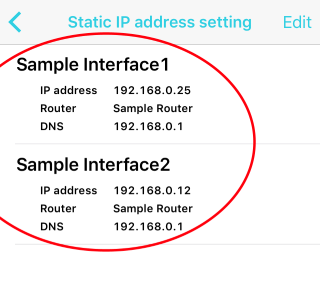
【SS Static IP address5_EN.PNG】
- Set SSID priority order list
Before you register device at SS, you can configure multiple Wi-Fi networks and their order of priority. Here are steps to setup the list:
- Login to SS
- At the “Device List” screen, tap the Raspberry Pi of your choice
- At the “Menu Screen” tap “Connect to Network”
- At the “Connect to the network” screen tap “Wifi”
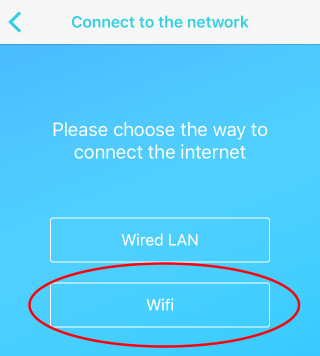
【SS Prioritizing SSID1_EN.PNG】
5. At the “Wifi List” screen tap ”+” plus sign at bottom right of your screen
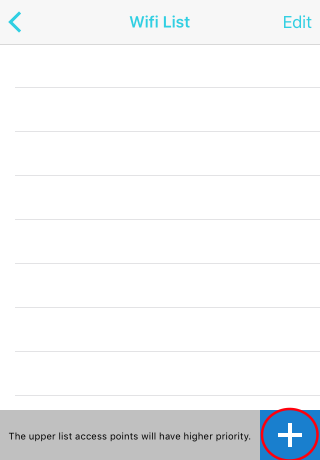
【SS Prioritizing SSID2_EN.PNG】
6. At the next screen input ”ssid”, ”psk”, and ”key_mgmt”. Then, tap “Add” to continue
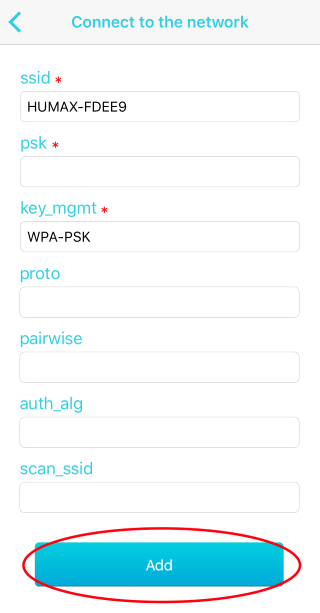
【SS Prioritizing SSID3_EN.PNG】
7. Ensure that your added Wifi SSID appears in the “Wifi List”
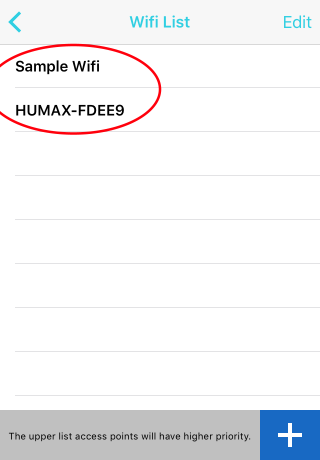
【SS Prioritizing SSID4_EN.PNG】
8. To change the network connection priority, tap Edit
9. Switch priority by dragging a SSID then tap “Done”
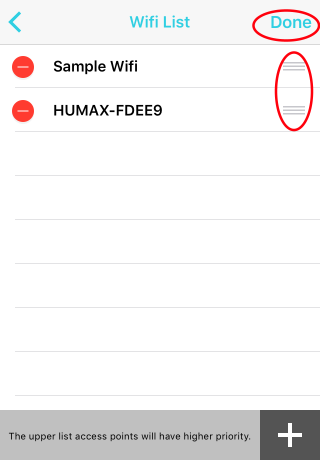
【SS Prioritizing SSID5_EN.PNG】
- Give a nickname to device
You can give a nickname to your Raspberry Pi during registration. Nicknames help you easily identify the device in SMC.
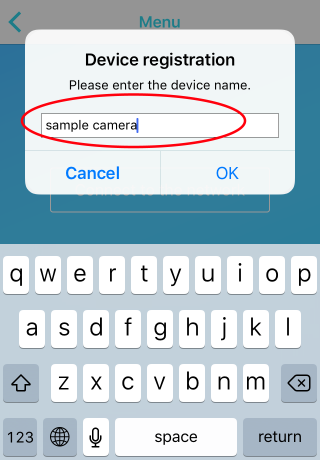
【SS Nickname_EN.PNG】
As shown in picture below, nickname appears in the SMC thumbnail
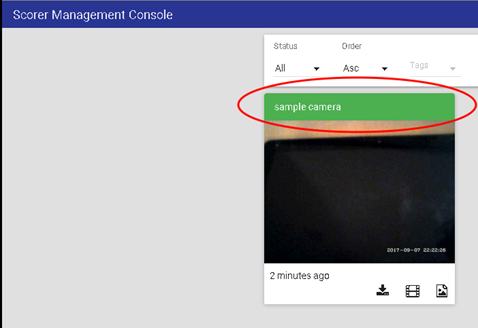
【SS and SMC Nickname.PNG】
--Problem fixes--
- Fixed crash problem at shutdown/reboot function
Prior to the SS version 1.4.1, SS used to crash if you try to either shutdown or reboot(*) the Raspberry Pi. This problem will not occur in current version.
*Followings are steps to shutdown/reboot the Raspberry Pi at SS
- Go to “Device List” screen. Tap a Bluetooth icon next to the Raspberry Pi you want to shutdown/reboot from the list
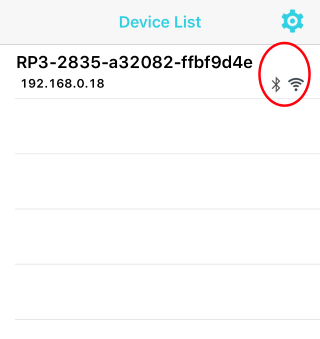
【SS Shutdown/Restart1_EN.PNG】
2. At the “Menu” screen the tap power button icon
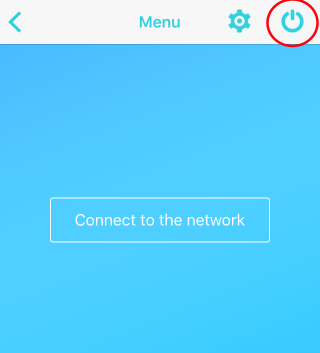
【SS Shutdown/Restart2_EN.PNG】
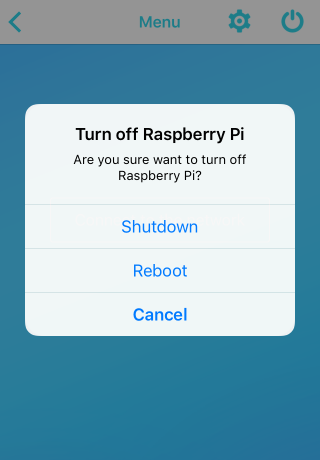
3. When you get message “Turn off Raspberry Pi”, tap either “Shutdown” or “Reboot”
【SS Shutdown/Restart3_EN.PNG】
- Resend authentication code
If you lose authentication code, you can ask SS to resend authentication code
Thank you for visiting our blog again. Rest of update details will be presented in the 2nd part. Next part will have update information on SCORER Camera Control and SCORER Management Console.